Vänligen börja på det första inlägget och läs din väg fram till det senaste, nedanför.

Välkommen med kommentarer i inläggen!

2008-03-26

Kontrollerkort: HighPoint RocketRAID 3520 8P — Intel IOP341 i 800 MHz

HighPoint RocketRAID 3520

Kontrollerkort och BBU

De flesta som läser HighPoint tänker direkt billigt skräp som inte funkar som det ska. HighPoint har inte helt oförtjänt ett ganska dåligt rykte. Därför är det vågat att köra på ett av deras kort i det här bygget. Förhoppningsvis kommer det att klarna framåt slutet av detta inlägg och ni kanske kan dela vår uppfattning att det kan göra sig i en kraftmaskin.

Nästan alla HighPoints grejer är bara vanliga billiga SATA2-kontrollerkort med lite flash-RAM att lagra diskkonfiguration i. Alltså likvärdigt med de flesta inbyggda SATA2-kontrollers. Det är egentligen ingen skillnad på att köra dessa korts RAID-inställningar jämfört med operativsystemets. Allt sker ändå i mjukvara och chansen är stor att operativsystemets RAID-implementation slår korttillverkarens på fingrarna.

HighPoints 3000-serie är däremot helt hårdvarubaserad. Eller traditionell RAID, där kretsar på instickskortet sköter allt arbete som har med stripning eller paritetsberäkning att göra.

HighPoint RocketRAID 3520

Under kylflänsen sitter Intels IOP341 klockad i 800MHz

Vårt ovannämnda kort är det bästa HighPoint har till salu och använder Intels IOP341-processor. Ettan i slutet förklarar att chippet har en Intel XScale-kärna. Det finns således en IOP342-version också med två kärnor men det blir ganska poänglöst när vi bara har åtta SATA2-kanaler.

XScale-processorn kan vara klockad i upp till 1,2GHz men i HighPoints fall är den klockad till stabila 800MHz.

IOP341 är ett så kallat SOC-paket. Chipet innehåller allt som behövs för att tillverka en RAID-kontroller: paritetsberäkning (XOR, RAID 6 P+Q och CRC32C), PCIe interface och SATA2 portar med mera. Läs här om du vill veta mer.

Tredjepartstillverkaren (HighPoint i det här fallet) behöver bara etsa kretskort med linjer mellan IOP341-sockeln och PCIe- och SATA2-kontakterna. Visst tillkommer det lite mjukvara ovanpå för att definiera RAID-konfigurationen men det är inte direkt en komplicerad uppgift – ens för HighPoint. Det är svårt att misslyckas när någon annan som Intel i det här fallet, har gjort nästan allt jobb åt en. Därför känns det ändå tryggt att välja denna kontroller trots att den kommer från en tveksam tillverkare.

Fortsättningsvis är kontrollerkortet bestyckat med 256MB 533MHZ DDR2 ECC RAM. Detta minne kan användas i write-back-cachat (vad ska vi ta oss till – finns det svenska ord för dessa termer?) läge då kortet bestyckats med en batterienhet som kan hålla minnet på kretskortet levande i upp till 72 timmar.

HighPoint RocketRAID 3520 med BBU

Kontrollerkort med batteribackup monterad

Normalt arbetar ett operativsystem eller kontrollerkort i ett av två lägen. Antingen i write-through eller i write-back. I det förstnämnda garanteras datasäkerhet genom att systemets skrivinstruktioner går ner direkt på hårddisken och semtidigt lagras i cachen. Dessvärre är det ineffektivt men alternativet skulle vara att data riskerar att gå förlorad. För majoriteten av oss användare är det oacceptabelt.

Genom att använda ett batteri till cache-minnet på kontrollerkortet kan det garanteras att det som cachas där till slut skrivs ned på disk. Det gör att vi kan använda det mycket fördelaktiga write-back-läget.

Skulle någon dra ut sladden på datorn medan data ligger lagrad i kontrollerns cache-minne, har vi 72 timmar på oss. Nästa gång datorn startas passar kontrollern på att skriva till disk, det som annars hade gått förlorat.

Till sist, en av grundkriterierna för bygget är att systemet ska fungera lika bra i OSx86 och Linux som i Windows. Detta kort är kompatibelt med Mac OS X och är enligt tillverkaren det snabbaste kort som existerar till Macintosh.

CPU & RAM

Right now, if you are looking for good bang for the buck, the Intel Core 2 Quad Q6600 does stand out a strong contender. Sure, there will be CPUs out there that run cooler and faster than this one. However, when taking price into consideration it is a very strong contender for most builds.

Recently, people have been finding success with the Xeon line 45nm CPU:s to come to the Intel 775 socket. The Xeon will normally run at a lower multiplier than its Core 2 counterpart. That does bring down the price somewhat. If you are looking to run a cool and quiet system these should also be considered. At the time of writing this article, the Xeon line has not been made available to retail yet.

In discussing the DFI LanParty LT X38-T2R one of the reasons for choosing this particular board is the stability of its 8-phase PWM. Hence, choosing a quad CPU should influence your choice of motherboard.

CPU & RAM

CPU & RAM ready for installation

The RAM modules are Corsair Dominator 2 by 2GB kits: TWIN2X4096-8500C5DF. These are no monster over clockers. They fry instantly if you try to push them beyond specification. Especially if you are a bit too gratuitous with voltage

Since we are not planning to run with extreme memory bandwidth (i.e. not above the rated 1066MHz), these will do fine. Initial results are encouraging and performance is plentiful considering the targeted FSB. Remember that over clocking 2GB DIMM:s are very hard to come by. Micron has moved most of its production to the DDR3 product space and as far as I am aware, has not made a 2GB part yet.

As far as we are concerned, we will not go busting our nuts trying to find the best 2GB DIMM out there. If high bandwidth memory is your thing, you may as well make the leap to DDR3. For our intents and purposes the performance provided by the aforementioned components go well with the overall requirements in mind.

Memory in place

RAM in place

We will be running four of these DIMM:s providing for a total 8GB. This will increase the stress on the north bridge somewhat. Our testing so far indicates it is nothing this system will not be able to handle. More on timings and settings later on.

CPU

CPU in its socket

The CPU is inserted for a quick photo. After taking a quick razorblade test of the CPU, which reveals whether the IHS is flat, concave or convex, we noticed ours needed some work. If the IHS is not flat, it may be a good idea to lap the top of the IHS until it is flat. Doing so can marginally increase thermal heat transfer in some situations.

Beware though, removing the electroplating and revealing the copper core of the IHS will expose it to patina forming on its surface. This is likely to inhibit heat transfer. Also, if the CPU IHS is quite flat to begin with the benefit of lapping is limited at best. You will obviously void your warranty in doing so.

A few posts down the road, we will see how the CPU ended up in the end.

In the next post we will have a closer look at the disk controller at the core of seven SATA2 disks. The HighPoint RocketRAID 3520.

2008-03-25

Motherboard: DFI LanParty LT X38-T2R

The motherboard is the vertebrae of a computer. Any signals between the different components of a computer system are going to pass through the different buses and bridges of the motherboard.

There are numerous motherboards and brands to choose from. DFI has made a name for themselves due to their extreme overclocking capabilities. Many will use these boards for its supreme performance. In our case, we choose the DFI due to its very powerful BIOS. Thanks to the very capable system customisations available we can optimise performance while still maintaining a low voltage and heat profile. The DFI takes some getting used to but once you are there, it is difficult to accept a more simplified interface.

Recently, it seems FoxConn has followed suit and are also making highly customisable motherboards. ASUS and other mainstream manufacturers are also coming out with more versatile systems lately. In any case, we went for a DFI with this build but as stated, there are many capable options out there.

Since the requirements dictate the use of a quad core processor, it has been proven the PWM-component is of more significant importance when compared to a dual core. DFI have consistently used 8-phase PWM:s across all their recent Intel Express chipset offerings.

The choice in the end, came to either the Intel P35 Express Chipset or Intel X38 Express Chipset. The north bridge of the P35 is a bit bandwidth limited and only has one x16 PCIe port versus the two x16 PCIe v2 ports of the X38. Due to the bandwidth requirements of the disk controller which will be covered later, we went for the X38. The P35 runs quite a bit cooler though and for many builders will still be the optimal platform.

Recently, the DFI LanParty LT X38-T2R was superseded by the X48 model which is almost identical in every other aspect.
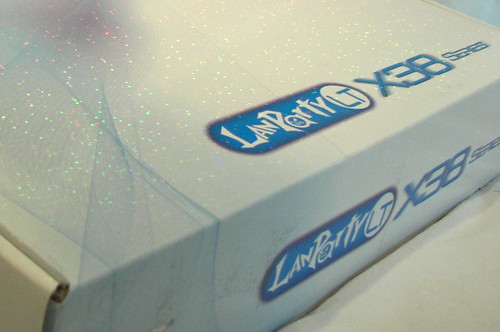
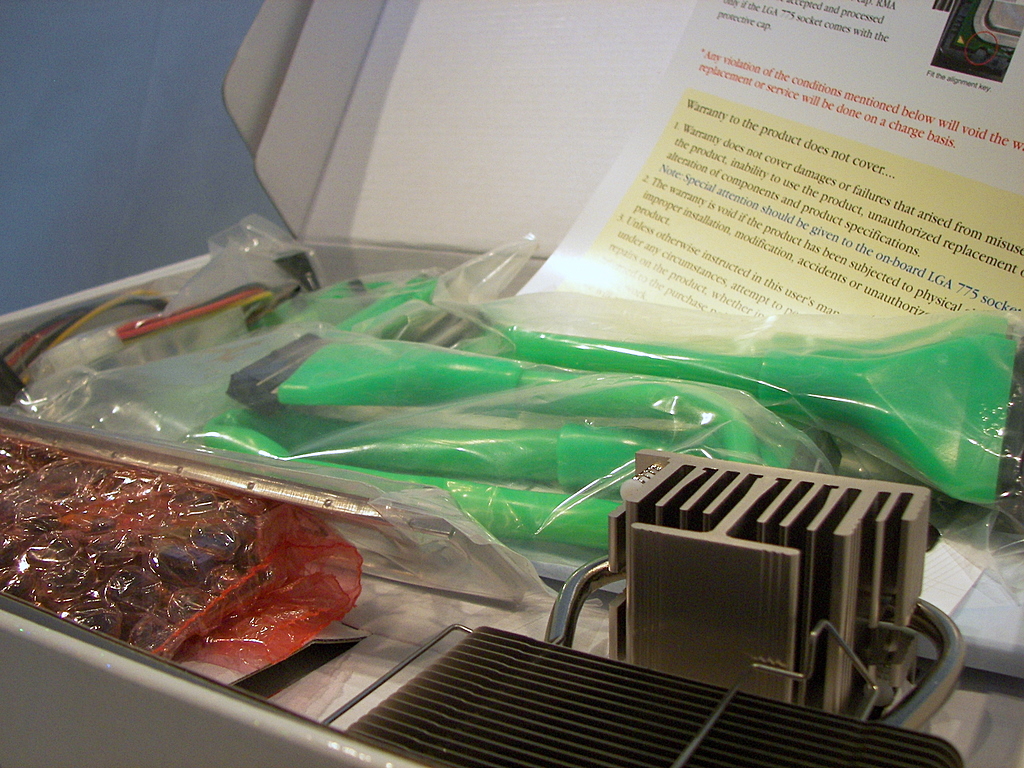
Unopened box

Still in the box

The X38 is packaged like most other DFI boards in a sparkling box. In my opinion, it has got a bit of a My Little Pony feel to it, with the glitter and gloss. They sure know how to make a first impression, in any case. What do you think, does it sparkle with all of you (sorry — just had to throw that South Park quote in there)?

Opened Box

Yes it’s a DFI — And yes, DFI love strong colours

As we open the box, the first thing you will notice are the potently green cables. Those bring to mind the vivid picture of a green poison dart frog. Scary, these cables must be poisonous, handle with care! Luckily we will not have to be using any of these cables.

In the left bottom corner, still wrapped up in plastic we can spot the Bernstein audio module that can be hooked up to the motherboard for HD sound. By giving the sound inputs and outputs a bit of a distance from the very noisy motherboard main paths a lot of distortion is eliminated. This has become the norm for high-end motherboards. Unfortunately, this module is unlikely to function well in OSx86, more on that later.

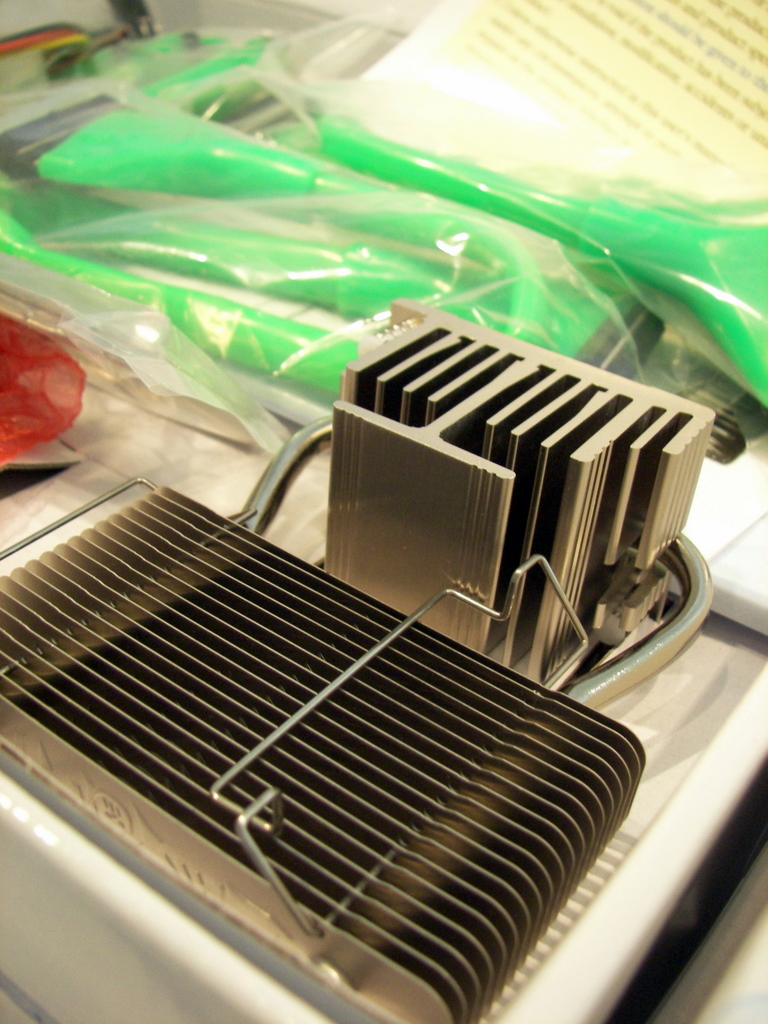
In the right bottom corner, the stock north bridge cooling presents itself. It can support a mounted small optional fan (which is not included) if necessary. Hopefully, it can provide adequate cooling without one but we shall soon find out.

NB cooler

A closer look

The cooler looks sturdy enough. There have been some complaints on forums that it does not cool very well though. Also, it does not present itself well to lapping. The contact surface in the middle is recessed a bit. It means you will have to shave off a lot of metal before reaching the contact surface. In any case, it is very difficult to lap the north bridge chip itself which normally is far from flat. Hence, perfect contact on the north bridge chip will always prove difficult.

MB South to North

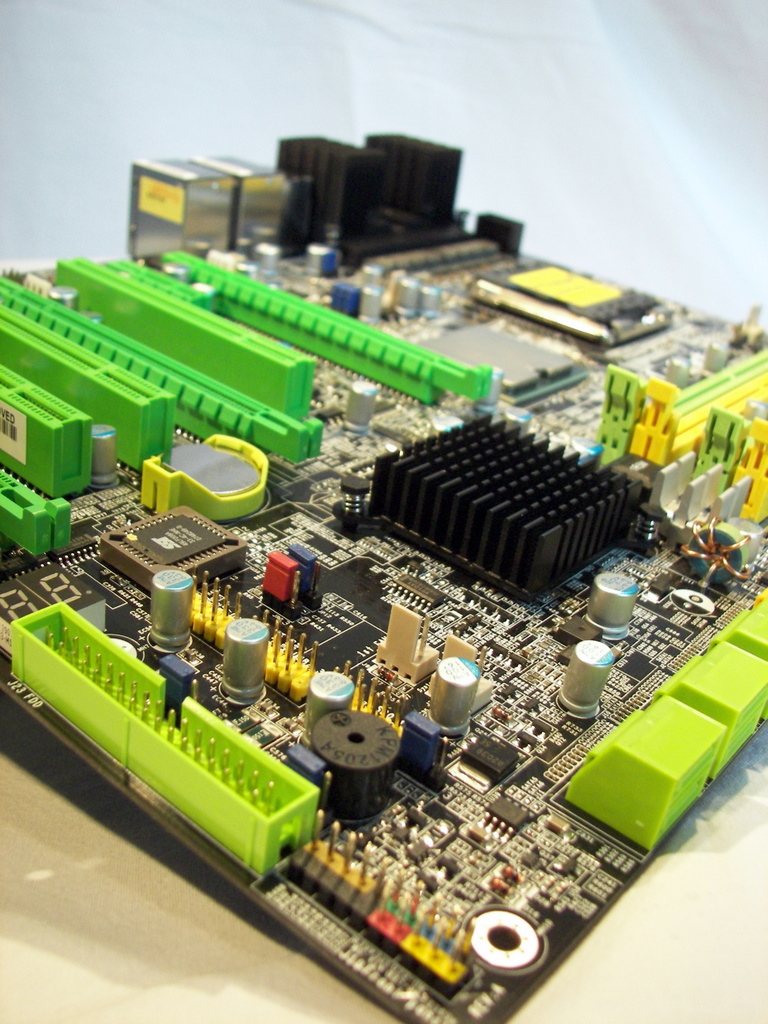
Motherboard overview

Green seems to be the theme! What happened to the sparkling box theme (imagine the sparkling cover art applied to the whole board in light pastel blue and pink — now how hot is that)? Well, at least the green matches the equally poisonous cables. Myself, I am probably getting a bit too old to appreciate all this colouring goodness to come out of computer parts manufacturers lately. The black PCB with white writing is gorgeous though.

Here is an idea: Make a completely black board. Black connectors, black DIMM slots, black everything, only with white text. That would stick out way more today than all this crazy cool colouring madness (Gigabyte takes the cake when it comes to colour blindness and crazy coolness, mind you).

You may have thought FoxConn was going to get it right with their FoxConn Blackops motherboard? Unfortunately there is little black about that board from what has been published so far. Again, a creative artist who smokes too much pot has mixed up his Clear eyes with the chemicals that made The Joker. I would pay a lot of money to see how these designers dress.

In the end, it is probably a case of myself not being crazy cool enough for this day and age. How about making a lethargically mundane edition, just for me?

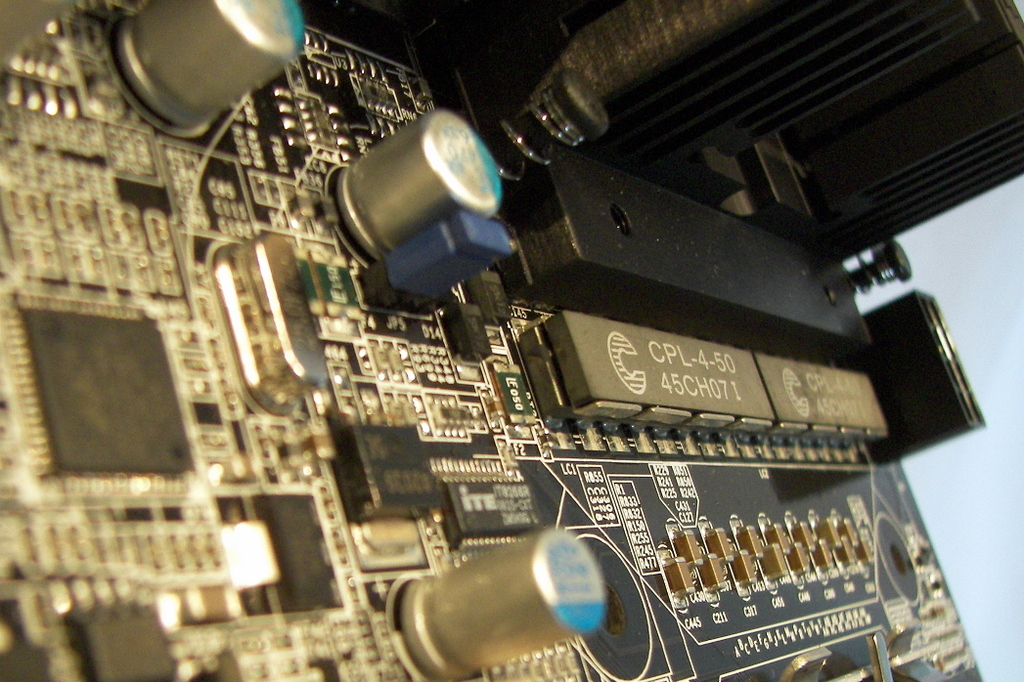
Nothing too fancy to say about the south bridge cooler, it is black and pretty small. It is probably adequately cooling the ageing ICH9R. Does anyone know what manufacturing process is being used for these south bridge chips? They do need a lot higher voltages than other motherboard components. Again, we will not make use of the south bridge features extensively. Read on and you shall see why.

A very useful feature visible in the lower left part of the picture, is the Award BIOS boot code display. It gives you an idea where in the process of booting your system is, as it freezes or power cycles when you are having problems.

South bridge

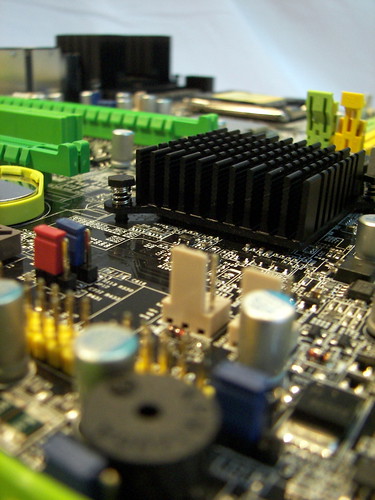
Rudimentary south bridge cooling

NB close-up

X38 Express nudity

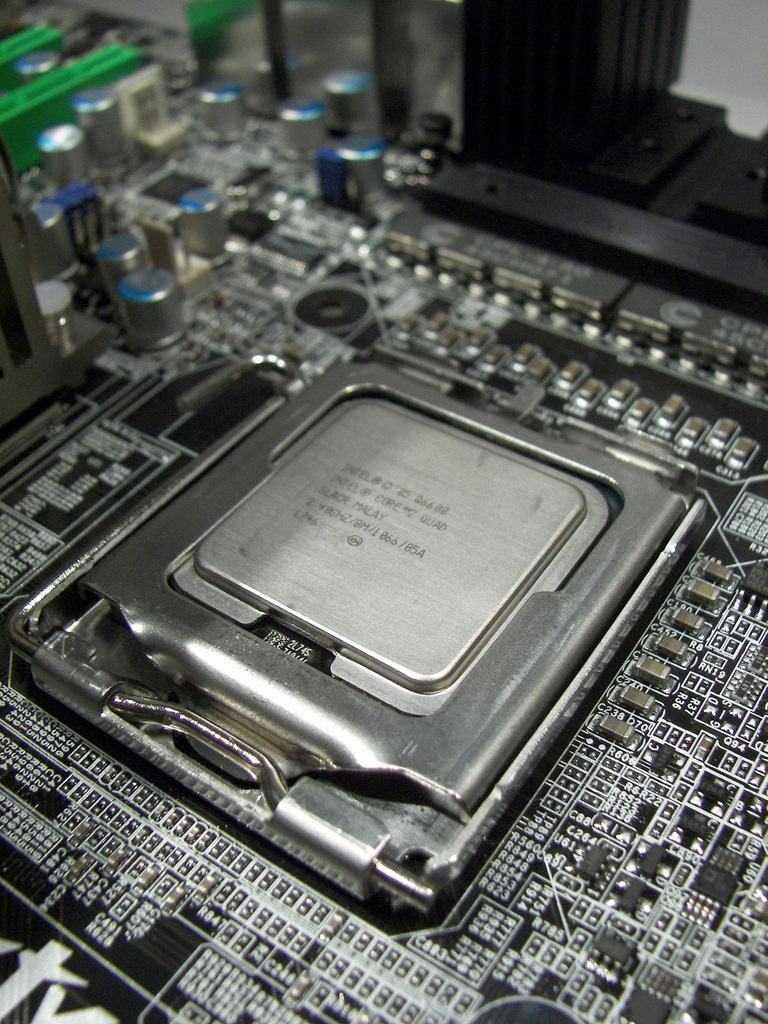
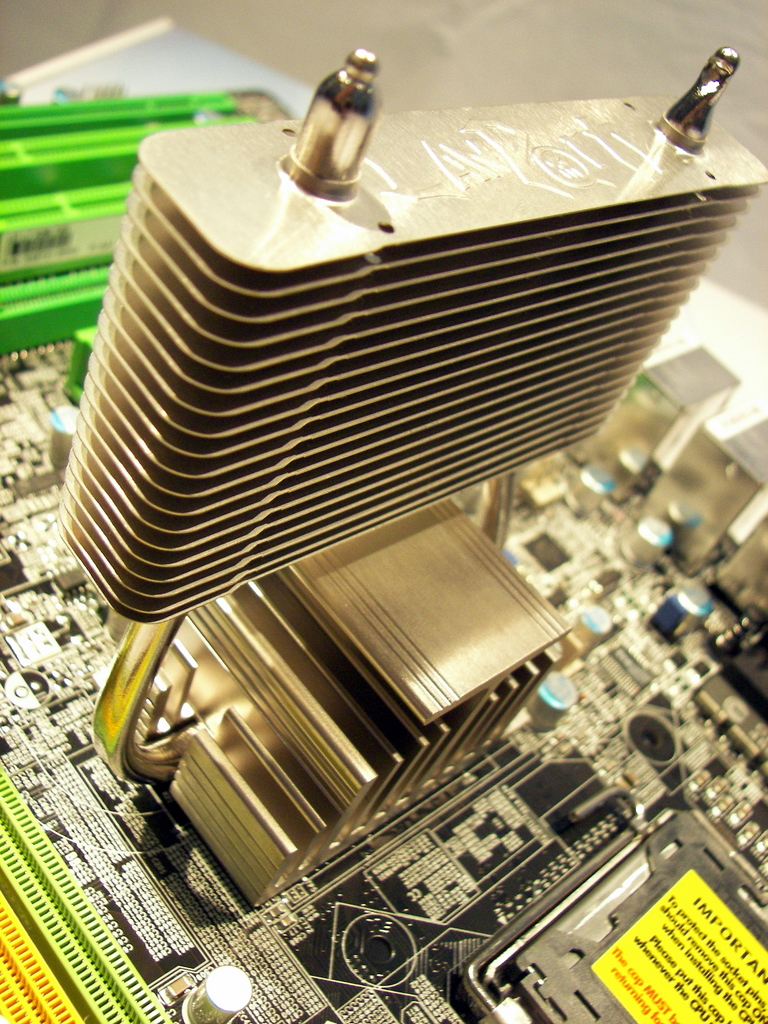
The NB will always have to be placed quite close to the RAM and CPU. This is the fastest bus of the motherboard. Distance is everything when it comes to synchronous clocking limits. With the stock north bridge cooler some CPU cooling solutions will have fitting issues due to the cramped space around the socket area. This is the case with most stock cooling solutions found on various motherboards. Luckily, unlike most heat pipe assemblies, the DFI LanParty LT X38 cooling is easy to replace.

PWM

PWM Cooling

The PWM component of this motherboard is one of its stronger suits, as described earlier. Reportedly, it provides for great Intel Core 2 Quad over clocking.

Cooling is unfortunately a bit under dimensioned as the PWM area does get quite hot under load. Good air circulation over this area is very important. DFI support forums argue evidence of these chips giving out at temperature readings at a bit over 60 degrees Celsius. Apparently the temperature monitor of this part is a bit inexact (as it does not represent well, the actual internal temperatures of the PWM chips) so handle with care. We may have to concede a loss to a small fan in the end, we shall keep you updated.
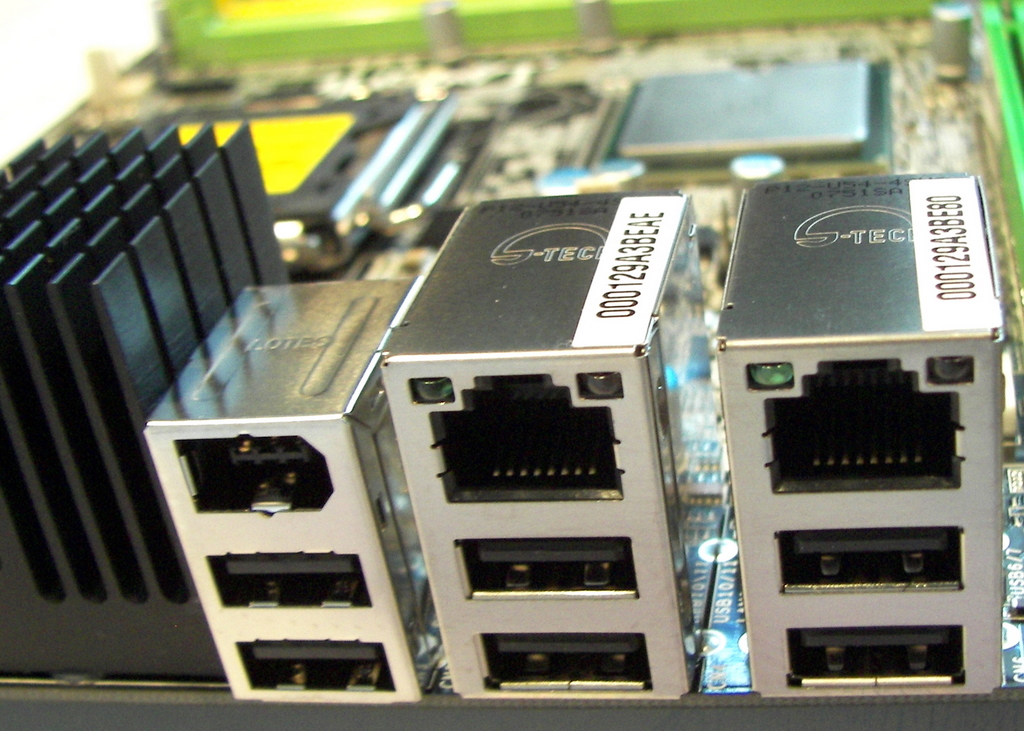
Backplane

Backplane view

The PWM cooler takes up a bit of space. Still there is enough room for one FireWire, two gigabit Ethernet and six USB2 ports. Further to the left there are two PS/2 connectors for a keyboard and mouse, pleasing the old school crowd among us.

NB cooler mounted

NB cooler mounted

NB skyscraper

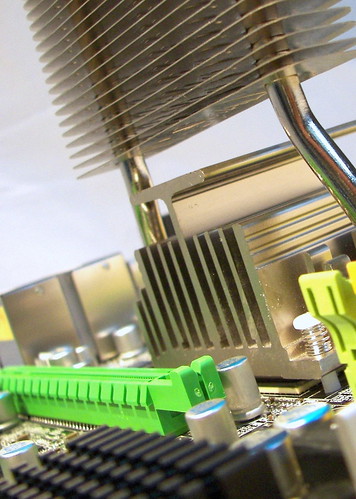
The NB photographed for dramatic skyscraper effect

The cooler came with some provided thermal interface material of unknown quality. We will be relying on Noctua NT-H1 instead, since it has proved quite resilient to fairly uneven surfaces. It is a lot thicker than most competing products and has been documented to provide favourable results in testing comparisons.

As can be seen above, the tower part of the cooler provides some additional clearance for CPU coolers. It is placed a bit further from the CPU but may interfere with the first PCIe slot instead.

This is as far as we will go when it comes to the motherboard. See the excellent DFI Club forums for further information. In the next post you will be able to read more about CPU and RAM choices.

Project: EnvyBuild – A Powerful & Quiet Workstation

This blog is about a computer build. This build aims to use some custom mods where see fit. It will feature a lot of nice photography covering any such initiatives.

To form a comprehenive view of the build from beginning to end, start with this post and work your way forward.

The requirements of the system are as follows:

  • Lots of RAM. As a workstation running tons of applications/application servers/web servers while developing we are going to max out the RAM as much as possible. 8GB seems to be the limit currently for most consumer grade motherboards.
  • Fast quad core CPU. While developing in any modern multi threaded IDE and running an application server and database on the backend will provide for more than four runnable threads. Hence, quad core makes sense for a heavy duty workstation. We do not need a liquid nitrogen cooled beast at 5GHz. In fact, we are not going to squeeze out every possible MHz out of the processor due to the added heat, conflicting with the next point of interest, below.
  • Quiet. No longer will we be able to live with fans that spin up irregularly every three to ten minutes. This system is going to be quiet. That means lots of constant low velocity 120-140 mm fans. It also means low voltages on the CPU, chipset and RAM, which in turn implies moderate clock speeds.
  • Usable in Windows Vista, Linux and OSx86. Sometimes we need to boot into a different OS to test features and functionality across the board. Also, some applications run better or are only available for one of the platforms listed.

Costs will be prioritised according to the requirements above. Hence, it will not make sense to pay for an Intel Core 2 Quad Extreme processor, when the limiting factor is going to be heat and ultimately noise. We will be going for air cooling since most quiet water cooling systems are fairly high maintenance and still a bit impractical in the long run.

CrossFire and SLI is not very well supported, if at all in Linux and OSx86. It will not be considered for this build as it does not agree with the requirements for many reasons. The graphics capabilities provided by a 8800GT GPU will work well in all three environments. It will even allow for an occasional game or two.

It is the authors aspiration that the knowledge gained by this build and eventually shared through this blog can prove useful to you, the readers and fellow builders. Comments and emails are very welcome and will be answered to the best of our abilities.

In the upcoming post, we will cover one of the most important components of a computer system: The motherboard, a DFI LanParty LT X38-T2R.